Telerik's RadPageNavigation control meets Mini SilverlightShow
In the Q3 Release of the RadControls for Silverlight, which is compatible with the RC0, you can find the RadPageNavigation control. It provides Silverlight applications with navigation, navigation history and possibility to use the browser's back and forward buttons. These three features are great and via them we are able to give the users greater experience when using Silverlight applications. For example we can create a standard web site scenario using several Xaml pages and the RadPageNavigation control and I've done it. This article describes the whole process I went through in order to implement the functionality of the control, but before write it, I needed a project. After quite a wondering I decided to implement part of the functionality of SilverlightShow into a Silverlight application and soon the name of the project was also revealed - Mini SilverlightShow. I choose that name because the Silverlight implementation of the site will have less functionality and will be smaller in size. Creative, isn't it?
Here you can find the Mini SilverlightShow live demo and source code. Now let's get the things explained!
Making some preparations
The first thing you should do is to download the RadControls for Silverlight 2 RC0. They can be found here, just click on free trial and you'll be redirected to the Client.net page - it requires registration. After logging in, or registering, click on the My Licenses and then choose My Free Trials in the menu.
Create your project and add a reference to the Telerik.Windows.Controls.dll.
The main page
In the Telerik.Windows.Controls.dll the RadPage class can be found. In order to use navigation in our Silverlight application our Xaml pages should be of type RadPage. For example let's convert the Page.xamll, which will be used for main page and will contain the most UI elements, to a RadPage. This is done by replacing the <UserControl /> with a <telerik:RadPage /> like this:
<telerik:RadPage x:Class="MiniSilverlightShowProject.Page"
xmlns="http://schemas.microsoft.com/winfx/2006/xaml/presentation"
xmlns:x="http://schemas.microsoft.com/winfx/2006/xaml"
xmlns:telerik="clr-namespace:Telerik.Windows.Controls;assembly=Telerik.Windows.Controls">
...
</telerik:RadPage>
also the partial class in the codebehind file must inherit from RadPage:
public partial class Page : RadPage
{
public Page()
{
InitializeComponent();
}
}
Every other page we use in this example is also of type RadPage, otherwise we won't be able to navigate to it.
The RadFrameContainer and the NavigationService
Here is how my Page.xaml looks in the browser:
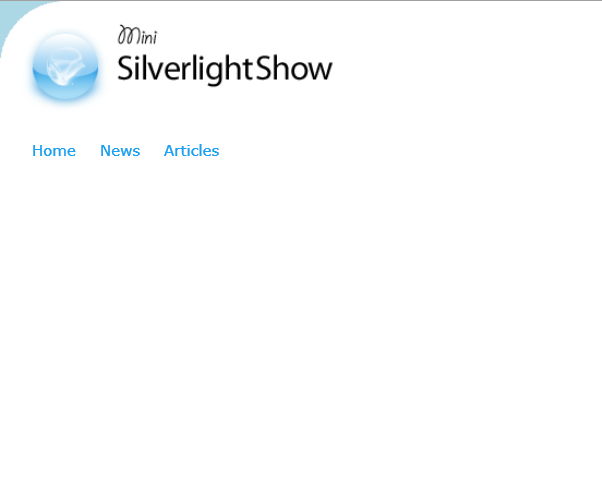
The big white place is where I display the other pages and to do that we also have to add a RadFrameContainer control to the page. This control is used by the NavigationService to display the selected page as a Frame. The frame container is also placed in the Telerik.Windows.Controls.dll, so we don't have to declare additional namespaces. Here is how it looks:
<telerik:RadPage x:Class="MiniSilverlightShowProject.Page"
xmlns="http://schemas.microsoft.com/winfx/2006/xaml/presentation"
xmlns:x="http://schemas.microsoft.com/winfx/2006/xaml"
xmlns:telerik="clr-namespace:Telerik.Windows.Controls;assembly=Telerik.Windows.Controls">
<Grid x:Name="LayoutRoot">
<telerik:RadFrameContainer x:Name="Content">
</telerik:RadFrameContainer>
</Grid>
</telerik:RadPage>
In order to finally implement the navigation we need to create a NavigationService:
public partial class Page : RadPage
{
NavigationService service;
public Page()
{
InitializeComponent();
this.Loaded += new RoutedEventHandler( Page_Loaded );
}
protected void Page_Loaded( object sender, RoutedEventArgs e )
{
service = NavigationService.GetNavigationService( this.Content );
service.Dispose();
service.FrameHistory.Clear();
FadeTransition tr = new FadeTransition( this.Content, TimeSpan.FromSeconds( 0.5 ) );
service.Transition = tr;
service.Navigate( new Home() );
}
}
We declare the service as global variable so we can use it anywhere in our Page class. Then we create an event handler for the Loaded event and in it we define the service. The most important thing here is the Navigate method, which has 4 overloads. I pass an object of type RadPage, in this case it's my Home.xaml page. By passing it to the Navigate method, it's loaded into the RadFrameContainer. The NavigationService also allow us to use transitions - SlideTransition and FadeTransition.
History and Back and Forward functionality
The NavigationService saves the history of browsing within the application and with its GoBack() and GoForward() methods you can navigate back and forward through it. You can use two buttons in order to call these methods.
The history can also be connected with the browser's History, Back and Forward buttons. For that purpose you should use an aspx page to display your Silverlight application and add an ScriptManager with enabled history to it:
<asp:ScriptManager ID="ScriptManager1" runat="server" EnableHistory="true"></asp:ScriptManager>
<div style="height:100%;">
    <asp:Silverlight ID="Xaml1" runat="server" Source="~/ClientBin/MiniSilverlightShowProject.xap"
           MinimumVersion="2.0.30923.0" Width="100%" Height="100%" />
</div>
Then in the App.xaml.cs file of your SIlverlight application add this line of code to the Application_Startup method:
private void Application_Startup( object sender, StartupEventArgs e )
{
this.RootVisual = new Page();
NavigationService.GetNavigationService().UseBrowserHistory = true;
}
This will enable the browser's back and forward buttons, which is the coolest things of all!
Bookmarking
You can add a bookmark to the page you have navigated to in the Silverlight application, but the Deep Linking is still not supported for this version of the control, though we can expect it with the next releases.
Navigating from a page in the RadFrameContainer to another page
Here is the case: I have a RadPage called News, that is opened in the RadFrameContainer placed in the Page.xaml. In the news page I have a ListBox that display a list of news and when I select an item I want to navigate to a page displays the item in the same RadFrameContainer. For that purpose we need a service that can navigate to it:
NavigationService service;
public News()
{
InitializeComponent();
this.Loaded += new RoutedEventHandler( Items_Loaded );
}
protected void News_Loaded( object sender, RoutedEventArgs e )
{
service = NavigationService.GetNavigationService( this.ParentFrame );
FadeTransition tr = new FadeTransition( ( Panel )this.ParentFrame, TimeSpan.FromSeconds( 0.5 ) );
service.Transition = tr;
}
By getting the service from the parent frame of the News page, I can display the next page in the RadFrameContainer of the Page.xaml.
Using one page to display items depending on a parameter
This is a very common scenario: we have items with the same structure just the information is different. The best practice here is to use one page and pass a parameter to it, depending on which the desired item is displayed. The possible problem here could be that you implement the functionality but after that you see one and the same item displayed no matter the value of the parameter. That's because every opened page is saved in the history with a name based by default on it's class. For example the page Item will be saved as MiniSilverlightShowProject.Item. This value is saved in the Path property of the RadPage. When navigating the NavigationService checks if an object with the same Path exists. Because the RadPage object is created before navigating to it we can give a unique value to the Path property and avoid that problem.
public Item()
{
InitializeComponent();
}
public Item( int id )
:this()
{
this.Path = this.Path + "_" + id.ToString();
...
}
Summary
I'm really amazed by this control - it enhances so much the Silverlight application and everything around it is so easy to implement. And most of all we can navigate through our application history using the browser, that brings Silverlight user experience to entirely new level. The guys from Telerik have done a really good job, and I await to see the next releases of this control and the features they'll bring.
References
Telerik's RadPageNavigation demo
Page Navigation for Silverlight 2 RC0 by Boryana Miloshevska from Telerik
Telerik's help page about the RadPageNavigation