Introduction
This article continues the series of articles about the .NET RIA Services framework and Silverlight 3. The scope of it is the DomainService class, which is used to create the business logic of the application and how it combines with the ADO.NET Data Model and the Enitity framework.
Here is a link to the live demo at this stage and the source code. Note that they will be updated with each article! ;)
Here are links to the previous parts of the series:
Creating applications with .NET RIA Service Part 1 - Introduction
Creating applications with .NET RIA Service Part 2 - Creating the project
Creating an ADO.NET Data Model
For my application I will create the Data Model from the aspnetdb.mdf file in the App_Data folder, which contains the tables for the ASP.NET Membership:
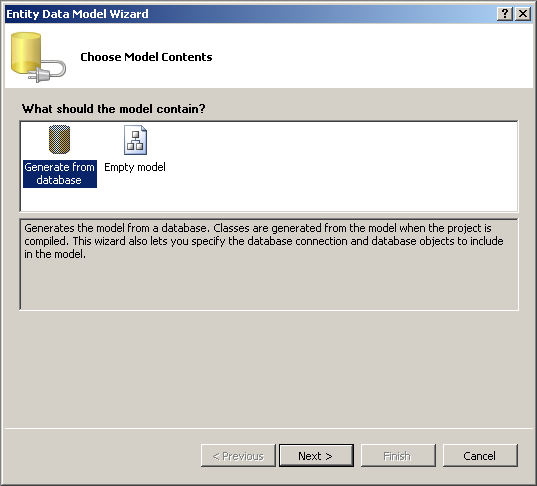
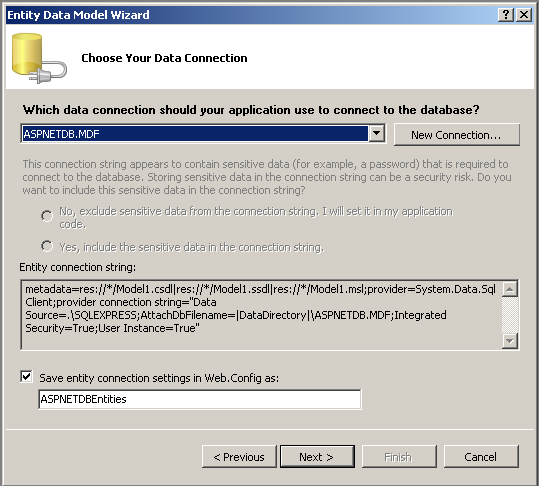
After that choose the desired tables:
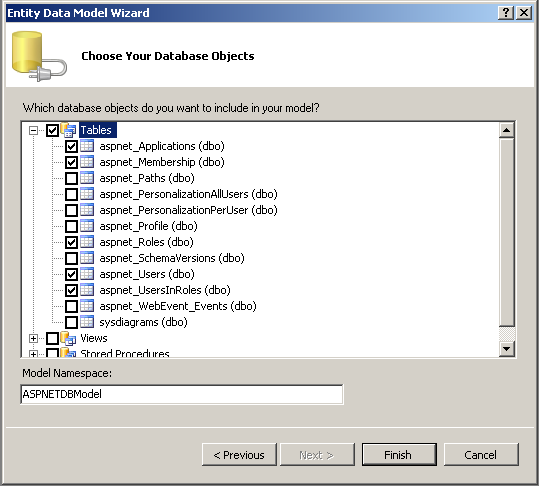
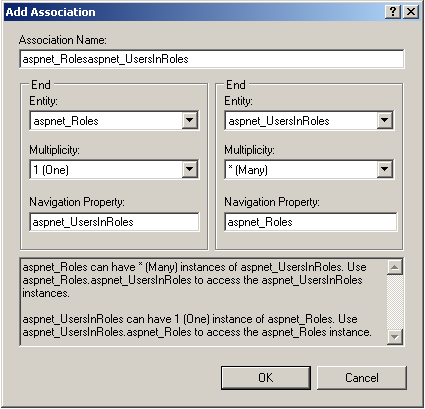
Note: In this case you can experience the following issue: if you add the aspnet_Users, aspnet_Roles and aspnet_UsersInRoles tables at one time, the aspnet_UsersInRoles table will be automatically used as Many-to-Many association between the aspnet_Users and the aspnet_Roles tables. The .NET RIA Services framework doesn't support this type of associations. So you have to add them one by one and manually configure the associations. Add the aspnet_Users first, then aspnet_UsersInRoles, which automatically creates One-to-Many association between them. At last add the aspnet_Roles, which again creates Many-to-Many association to aspnet_Users, but this time we have the aspnet_UsersInRoles table available. Now delete the Many-to-Many association and manually create association between the aspnet_UsersInRoles and the aspnet_Roles tables:
That's all regarding the ADO.NET Data Model.
Adding a DomainService class
The next step is to add a DomainService class, in which we will define our business logic. The DomainService class in the .NET RIA Services framework works only with entities, so you'll have to use a data model.
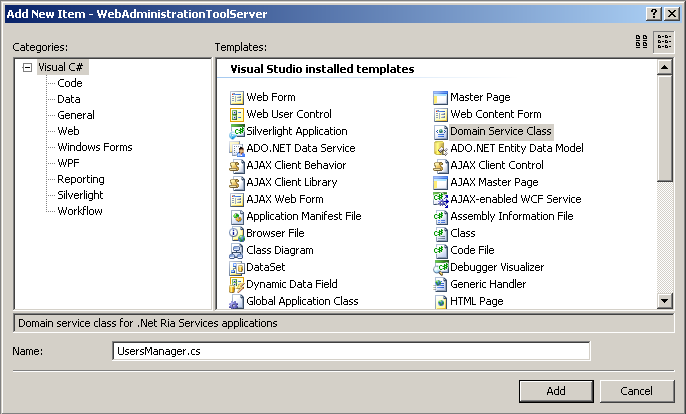
Select the server project and add a new DomainService item to it:
In the next step select which entities to be included, choose whether or not they will be edited and check the "Generate associated classes for metadata". In the metadata file an information about the entities is generated, so they could be used later on the client. The metadata file is one of the file type, which content is generated on the client:
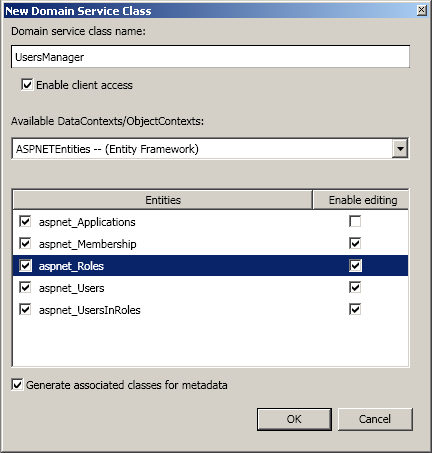
That's it. If you now open the UsersManager.cs file you will see that CRUD methods were generated for each entity that was selected as editable. The logic in these methods can be modified to our likings. For the aspnet_Applications entity we have only Get method. As you can see there are no attributes applied to the methods so I suppose that the names of the methods could play a role when determining which method is used for update and which for delete, so I suggest not changing the names.
The metadata file
Now let's see what the metadata file can be used for. The metadata contains information about the entities that allows them to be generated on the client. Here we can apply attributes to the properties of the entities that will be available on the client too or mark whether the property to be generated on the client or not. For example:
internal sealed class aspnet_UsersMetadata
{
// Metadata classes are not meant to be instantiated.
private aspnet_UsersMetadata()
{
}
public Guid UserId;
[Required]
public string UserName;
public string LoweredUserName;
public string MobileAlias;
public bool IsAnonymous;
public DateTime LastActivityDate;
[Include]
public aspnet_Applications aspnet_Applications;
[Include]
public aspnet_Membership aspnet_Membership;
[Include]
public EntityCollection<aspnet_UsersInRoles> aspnet_UsersInRoles;
public EntityState EntityState;
}
The properties that describe the relations between the entities should be marked with the [Include] attribute in order to be available on the client. The UserName property is marked as [Required] and if bound to a DataFormField on the client, it will be validated as required.
Using the DomainService class on the client
Loading the Data
We have created a DomainService class on the server and now it's time to use it on the client. Let's see what functionality provides our UsersManager on the client - open the MainPage.xaml and modify the MainPage() constructor:
public MainPage()
{
InitializeComponent();
UsersManager manager = new UsersManager();
}
If you take a look at the manager you'll see that it contains a property of type EntitiyList and a load method for each entity. When you call the load method for a particular entity, a call to the get method on the server is made and the result is stored in the respective property. Of course the call is asynchronous and we have to handle the Loaded event of the manager.
Let's add a DataGrid to our MainPage.xaml and load the aspnet_Users in it:
UsersManager manager;
public MainPage()
{
InitializeComponent();
this.manager = new UsersManager();
manager.Loaded += new System.EventHandler<LoadedDataEventArgs>( manager_Loaded );
}
private void manager_Loaded( object sender, LoadedDataEventArgs e )
{
this.UsersGrid.ItemsSource = manager.aspnet_Users;
}
That's it!
Updating the data
The DomainService class tracks the changes to each entity in the EntityLists. To know if there are any changes, check if the HasChanges property is true, if it is, then call the SubmitChanges method or if you don't want to submit them reject them using the RejectChanges() method.
Conclusion
These were the basics of the DomainService class and there are many more things that we are going to discover in the next couple of articles. So stay tuned and if there are any questions don't hesitate to ask and I will try to answer you.