This article is compatible with the latest version of Silverlight.
1. Introduction
Silverlight 3 introduced a lot of new functionalities. One of the things that we have been missing in Silverlight 2 was the element effects. If you want to make your elements more attractive then you need to write your own custom effects. Of course there are additional libraries (such as Silverlight.FX), which offer a great number of effects and animations. Fortunately, in Silverlight 3 such effects have been implemented.
In this article I will develop a simple Silverlight Slide Show using Pixel Shader effects. Here is one great article making introduction of the pixel effects in Silverlight. I will repeat some of the things and will try to add new information to that article.
Download Source
2. Introducing High Level Shading Language
Silverlight 3 adds support for High Level Shading Language (HLSL) shaders with the ShaderEffect base class, allowing almost unlimited visual effects to be applied to your elements. The most important feature of the HLSL shaders is that they are compiled under DirectX, which means that they are done using the GPU (video card). Too good to be true, isn’t it? Yes of course, the pixel shaders are implemented on the GPU only in WPF; in Silverlight they are rendered using software – based algorithm!
2.1. Developing HLSL shaders using Visual Studio Template
In order to create your own custom shaders you need to install the following products:
- DirectX SDK
- Shader Effect Visual Studio Template and Build Task
Writing HLSL code can be sometimes tricky, particularly adapting your mind to the limited number of instructions that can be executed. But in few words the HLSL allows you to manipulate images and create a various (practically unlimited) range of effects. Let’s take a quick look at a simple HLSL program and see which are its elements. When you create a new shader effect you will see three new files that are created for you.
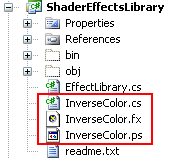
- The InverseColor.cs file is a wrapper file for your shader effect.
- The InverseColor.fx file contains your HLSL code. In that file you will write your shader effects.
- The InverseColor.ps file is added after you compile the shader effects.
Basically one HLSL program contains two parts. The first one is taking the input parameters. And the second one is the main function. First you need to take the input image that will be used by the shader effect. This happens in the following line of code:
sampler2D Input : register(s0);
A parameter named Input of type sampler2D will use a value stored in register s0. This is your image that will be manipulated.
Next is the main function:
float4 main(float2 uv : TEXCOORD0) : COLOR0
{
// Insert you shader code here
}
The main function takes as an input a vector containing two floats named uv corresponding to the x and y coordinates of a pixel and returns a vector containing four floats corresponding to the Red, Green, Blue and Alpha values of that pixel. In the most common scenario you will apply arithmetic operation to all of the pixels of an image. For example you need to use the sine and cosine functions if you want to produce a graphical wave. In our example we would like to invert the color of each pixel and to produce an image with inverted colors. This is done by the next code snippet:
float4 main(float2 uv : TEXCOORD) : COLOR
{
float4 color = tex2D( Input, uv );
float4 inverted_color = 1 - color;
inverted_color.a = color.a;
inverted_color.rgb *= inverted_color.a;
return inverted_color;
}
The result of applying the effect can be seen on the next picture:

There are a lot of articles explaining the HLSL syntax. For those who want to dive in the jungle of HLSL I recommend to use the official section in MSDN for the HLSL.
3. Developing Silverlight Slide Show
In the next lab I will guide you through the development of a simple Slide Show using HLSL shader effects. Before I start I would like to note that in this lab I will not discover America. All effects used in the sample are taken from the Windows Presentation Foundation Pixel Shader Effects Library, which is located on Codeplex, and provides sample effects for WPF and Silverlight application.
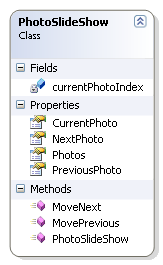
The business object model of the application contains only few classes:

It contains the name, the description and the Uri for the photo.
- The PhotoSlideShow business object is an observable collection of photos which will be played in the slide show. It handles the logic to determine which are the previous, the next and the current photos in a slide show.
- The TransitionEffectsManager object registers all shader effects that will be used in the slide show. It is responsible for determining which is the next effect to be applied.
Next let’s take a quick look at the TransitionEffectsLibrary project. Few moments must be marked. All shader effects inherit from the ShaderEffectBase class. It defines the most common property for all shader effects:
public static readonly DependencyProperty InputProperty =
ShaderEffect.RegisterPixelShaderSamplerProperty( "Input", typeof( ShaderEffectBase ),
0, SamplingMode.NearestNeighbor );
The InputProperty is practically the input image that will be used by the HLSL code.
The TransitionEffect abstract class is a base class for all transition effects. It defines common properties and methods for the transition effects:
// Dependency property for the old image.
public static readonly DependencyProperty OldImageProperty =
ShaderEffect.RegisterPixelShaderSamplerProperty( "OldImage", typeof( TransitionEffect ),
1, SamplingMode.NearestNeighbor );
// Dependency property for the transition progress.
public static readonly DependencyProperty ProgressProperty =
DependencyProperty.Register( "Progress", typeof( double ), typeof( TransitionEffect ),
new UIPropertyMetadata( 0.0, PixelShaderConstantCallback( 0 ) ) );
The user interface of the slide show contains just two controls. The first one – the PhotoHost control is used to display only a single full photo. It will display the current photo in the slide show. The second control – the SlideShowControl control is used to display the slide show of photos with applying shader transitions effects. Practically this control contains the main logic for running the slide show. You can see its template on the next figure:
<Style x:Key="SlideShowControl" TargetType="local:SlideShowControl">
<Setter Property="Template">
<Setter.Value>
<ControlTemplate TargetType="local:SlideShowControl">
<Grid x:Name="Root" HorizontalAlignment="Stretch"
VerticalAlignment="Stretch"
Background="Transparent">
<Border x:Name="PART_Host" Margin="0,5,0,5"/>
</Grid>
</ControlTemplate>
</Setter.Value>
</Setter>
</Style>
The control has a DispatcherTimer which is used to run the slide show. At some interval (by default it is 5 seconds) the photos are changed applying the shader effects. That happens in the ApplyEffectAnimation method. The code for the method is shown in the next figure:
private void ApplyEffectAnimation()
{
TransitionEffect effect = TransitionEffectsManager.Instance.CurrentEffect;
Storyboard progressStoryboard = new Storyboard();
DoubleAnimation da = new DoubleAnimation();
Storyboard.SetTarget( da, effect );
Storyboard.SetTargetProperty( da,
new PropertyPath( TransitionEffect.ProgressProperty ) );
da.From = 0;
da.To = 1;
da.Duration = TimeSpan.FromSeconds( 2.5 );
da.FillBehavior = FillBehavior.HoldEnd;
da.Completed += new EventHandler( this.OnEffectAnimationCompleted );
progressStoryboard.Children.Add( da );
progressStoryboard.Begin();
WriteableBitmap wb = new WriteableBitmap( this.tempPhotoHost, null );
ImageBrush imageBrush = new ImageBrush();
imageBrush.ImageSource = wb;
this.tempPhotoHost.Width = this.tempPhotoHost.ActualWidth;
this.tempPhotoHost.Height = this.tempPhotoHost.ActualHeight;
this.tempPhotoHost.Measure( new Size( this.tempPhotoHost.ActualWidth,
this.tempPhotoHost.ActualHeight ) );
this.tempPhotoHost.Arrange( new Rect( 0, 0, this.tempPhotoHost.ActualWidth,
this.tempPhotoHost.ActualHeight ) );
effect.OldImage = imageBrush;
this.currentPhotoHost.Effect = effect;
}
The control also contains methods for player buttons events (Start, Stop, Pause, Next Slide and Previous Slide).
The result can be seen here. On the left side of the page in a list box are displayed all available shader effects. Also the current selected item is the next shader effect that will be applied.
4. Conclusion
Applying shader effect is only one of the features in Silverlight. Writing custom HLSL can be sometimes tricky because all you have to do with the image is to apply some math functions. But also creating HLSL makes your elements more attractive and only the sky can be the limit for you.
During the development of the demo for the article some lack of functionality made me impression again and I want to write it here. One of the things that are missing in Silverlight is the VisualBrush. In WPF VisualBrush is used to create a brush based on some visual elements. After that the brush may be used for painting other elements. In Silverlight we have a VideoBrush and ImageBrush. But both classes are sealed and we cannot create our own implementation. Also that with the VisualBrush, without having some of the other, you could still do everything you want. Fortunately, there is a work around. In the demo application I use a WritableBitmap to render the photo hosted in the memory.
5. References
- http://msdn.microsoft.com/en-us/library/bb509561(VS.85).aspx
- http://wpfshadereffects.codeplex.com/Release/ProjectReleases.aspx?ReleaseId=31112
- http://en.wikipedia.org/wiki/High_Level_Shader_Language