This article is compatible with the latest version of Silverlight.
This is part 5 of the series “Silverlight in Action”.
Here we’re sharing our experience from the amazing CompletIT web site.
Maybe the hardest feature to implement from the entire site was the Smoking menu effect. We’ve tried out a lot of ideas and I’m going to summarize some of them:
- We thought to use a video as a background, but its performance was bad. Blending the video with the background was hard to do. Randomizing the smoke to make it more realistic would be almost impossible if using a video, as well.
- After that we tried to make a Path that looks close to one knot from the smoke. We copied that path for example 50-100 times, randomized these paths in some manner and animated them to move like smoke. This idea was partly close to the effect, but still far away from a real smoke effect. And also hard to scale.
- One very interesting approach that we found was to create a snapshot of real smoke. And then to use PixelShader effect to create the fluid movement of the smoke. This idea could be implemented but needs a lot of work, more than basic physics knowledge and the writing of lots of code in HLSL, which wasn’t that easy. Also it was not very clear if this was going to perform good enough (knowing that the whole site is moving and flying around).
- Particle system. There are already some Silverlight smoke particle system realizations out there on the web. This was maybe the most obvious way of creating a smoke effect and also somehow easy to do, but the actual result was not very satisfying and didn't look like fluid smoke.
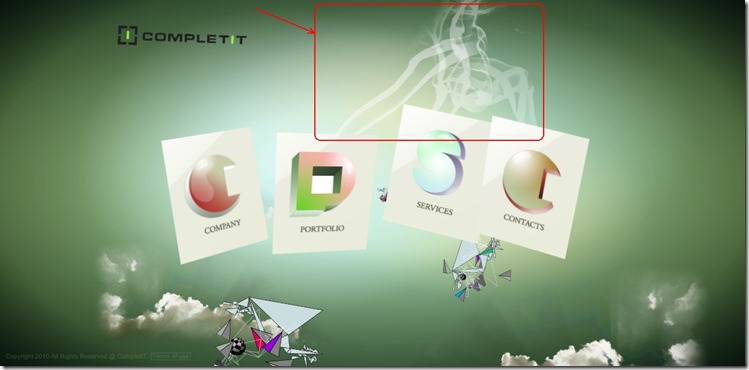
Here is a snapshot of the real look of the smoke.

Smoke effect in Action
The Idea - Sprite Animation
We’ve decided to implement an idea that is very old and well-know in games development. A sprite animation is a predefined sequence of related images that looks like an animation/movement when changed in a fast way. In our example we change smoke frames on 20 frames per second. All image frames are around 100.
Implementation
There are a couple of different approaches to achieve sprite by using Silverlight. And one of the widespread implementations includes creating an Image control in Blend for every frame and after that creating a Key-Frame animation that hides the previous and shows the new one. Also you can create a big image that has all the frames and you can then clip this big image to show the current frame.
But we’ve implemented it in another way. We hold only one Image control and change its Source property on every frame. We’ll create a base class called ImageSequenceControl that will do most of our job. It’ll hook up the CompositionTarget.Rendering event and will change the frames accordingly.
In the constructor of this control we’ll pass a parameter - fps (frames per second). When having it we can calculate the interval between the frames.
protected ImageSequenceControl(int frames, double fps)
: this()
{
this.frames = frames;
averageInterval = TimeSpan.TicksPerSecond / fps;
}
And here is the CompositionTarget.Rendering handler.
//Raised before drawing of every frame.
private void CompositionTarget_Rendering(object sender, EventArgs e)
{
long now = DateTime.Now.Ticks;
//Since we run on custom fps, we need to check if it's time to draw new frame.
if (now - lastTick < averageInterval)
return;
if (AutoReverse && now < pauseStart + pauseSec)
return;
//We've finished the frames and may start again.
if (frame == frames)
{
if (AutoReverse)
{
Randomise();
pauseStart = now;
}
frame = startFrame;
}
if (AutoReverse)
{
//Managing the opacity to make the effect of disapearing when reaching the last frames.
double ratio = (double)(frame - startFrame) / (frames - startFrame);
image.Opacity = .5 - 2 * (.5 - ratio) * (.5 - ratio);
}
//Show the next frame.
image.Source = images[frame - 1];
frame += 1;
lastTick = now;
}
The actual Image information (url sources) is implemented in the sub-classes like SmokeControl.
public class SmokeControl : ImageSequenceControl
{
private static readonly Random random = new Random();
public SmokeControl()
: base(118, 10)
{
AutoReverse = true;
RenderTransformOrigin = new Point(0, 1);
}
protected override string GetImageName(int index)
{
return string.Format("Smoke/Comp 1 {0:000}.png", index);
}
protected override void Randomise()
{
CompositeTransform transform = this.EnsureTransform();
transform.Rotation = random.Next(-30, 0);
startFrame = random.Next(1, frames / 2);
}
}
Stay tuned for more articles from this series coming up next week.