It was just days before this year’s Halloween when I was searching for those nifty applications that let you play scary sounds directly from your mobile phone; thought that would be a great entertainment for my young daughter.
And it was.
Later I decided to create a similar application to run with Silverlight. I knew porting such application to Silverlight would be fairly easy, but the real challenge was in doing it with as less coding as possible. And how exactly do you write an application without writing code, some may ask?
Behaviors
Expression Blend 3 introduced a new way of adding interactivity to user interface elements, called behaviors. Behaviors are reusable parts of code that extend either a specific type of visual element (like TextBox or Ellipse), or perhaps one of the base types that many elements inherit from (like FrameworkElement). Personally, I like to describe behaviors using the following analogy: where developers play with events and methods, integrators use triggers and actions (two kinds of behaviors)… Wait! Integrators?
In WPF/Silverlight world, the integrator sits between designers and developers, breathing the life into beautiful, but static graphics that designer had thought up, by using all that great code he gets from the developers on the team. It’s also the role that Expression Blend developers had in mind when creating the product. Because integrator’s job is creating the best user experience possible, it’s important that he is familiar with UI patterns and usability in general. Developers with a sense of aesthetics and designers, able to design for interaction, also make great candidates for the role.
There are actually three kinds of behaviors: a trigger, an action and a behavior. A trigger is used to invoke some action, while behavior can best be thought of as the combination of the two. For example: we can have a ShowMessageBoxOnClick behavior listening to button’s click event (a trigger) and when clicked, showing a message box (an action). Because clicking on something and showing a message box aren’t directly related, this behavior could easily be split into independent Click trigger and ShowMessageBox action, which would open a wide range of possibilities for mix’n’matching different behaviors. Like showing a message box on timer elapse. Or playing a sound on click event.
Setting up the Application scene
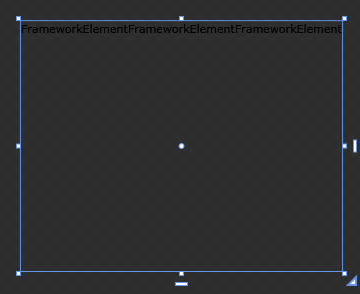
So we’re building a Halloween sound playing application. It should look at least a bit creepy, so we’ll begin by creating a tombstone-shaped panel that will host a few buttons that would play a sound when user clicks on them with a mouse. Simple buttons will be used to display shapes and when clicked, the associated sound would play. An ItemsControl control will host nine buttons and Silverlight Toolkit’s WrapPanel will take care of properly arranging those buttons into a 3x3 grid. Here’s how the ItemsPanel template looks like (note it’s just an ordinary WrapPanel, without any properties explicitly set):

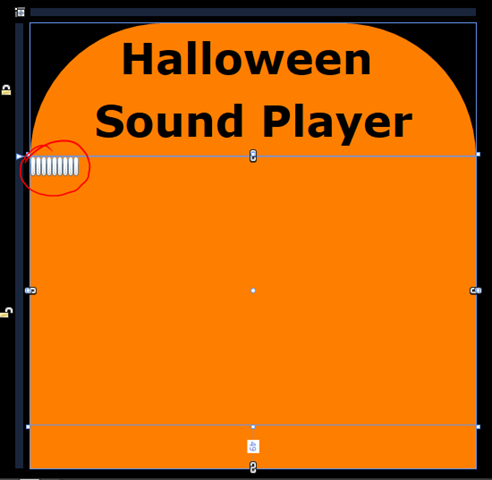
We’ll continue with inserting some buttons into the ItemsControl’s Items collection. Click on the ellipsis button next to the Items property to display the items editor. Then click on an arrow next to the Add another item button to display the list of commonly used controls. Choose the Button (#1 in the list) and repeat until having 9 buttons in the list (representing nine shapes and sounds).
Adding shapes
Rather than collecting clipart from various places on the internet, I used a special dingbats font I found a while back while looking for online Halloween stuff; dingbats seemed perfect for the shapes:

Because every dingbat is associated with a specific font character, we only need to change each button’s properties to display the content with the new font, in appropriate size. To make life easier and keep things cleaner, we’re going to restyle just the first button, then apply the same style to every other button in the list. A single TextBlock in the template should take care of the required looks.
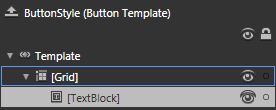
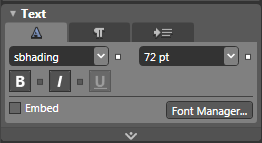
After setting style to the button, we have to assign a certain letter each button to get the shapes we want. After doing that, I also set the grid’s size to 150x150 pixels to get a nice tiling effect for the shapes in the tombstone, which was 450 pixels wide:
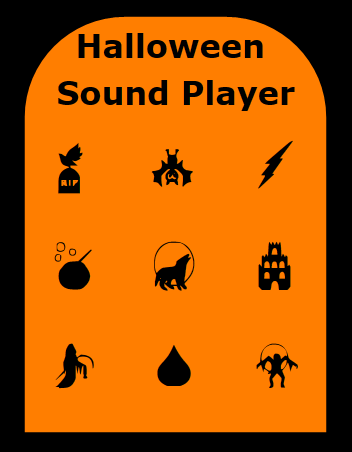
With the scene set up, it’s time we finally start playing with behaviors.
ChangePropertyAction
First behavior we're going to learn more about, is called ChangePropertyAction. ChangePropertyAction will change a chosen property (optionally animating it) when triggered with any trigger available. We’ll use this behavior for changing the shapes’ appearance slightly when mouse is over them. Because we’re changing the appearance of the TextBlock displaying the shape, we’re going to be adding this behavior to that same TextBlock.
In Blend, all behaviors are available through the Assets tab. If we know exactly what we’re looking for, we can also use a very convenient search box, placed on top of the lists. Using this search feature saves us from browsing through (possibly) several pages of assets we might have included in the project. The best thing about Assets tab (including search) is that it lists all assets from every referenced library, making discovery of assets a whole lot easier.
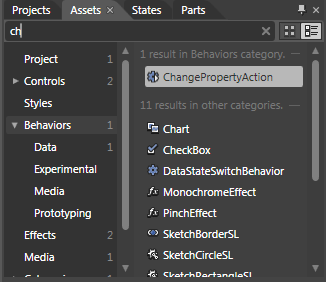
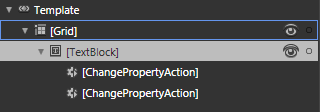
Having found the ChangePropertyAction behavior in the assets library, drag it over to the button template and drop it exactly over the TextBlock. The tooltip will display “Create in [TextBlock] / ChangePropertyAction” text as a hint when you’re on the right place. The attached behavior will then be displayed as the TextBlock’s child:
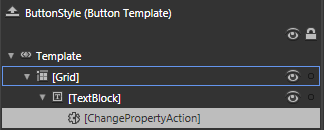
Cool! We’ve just extended the TextBlock with a new behavior. Let’s look at its properties:
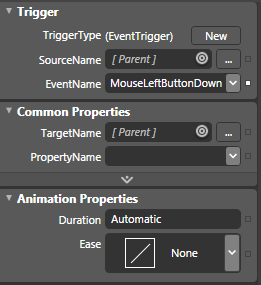
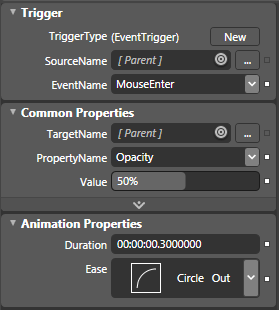
The Trigger section is used for setting the action trigger. As you can see, TriggerType is set to EventTrigger by default and EventName lists all the events which parent control exposes. The parent control is currently set to the TextBlock, because this is the element we attached the behavior to. We’re fine with that, but if required, we could also listen to other element’s events by changing the SourceName property to some other element (the handy target icon let’s us select the element without having to enter it’s name in the property box). In this section, we only need to change the EventName to MouseEnter, which will ensure the trigger will go off when mouse enters in TextBlock’s visible space.
The CommonProperties section lets us choose the Property, which value we want to change. Optionally, we could also change the TargetName to change the target element. We’ll make the shape slightly transparent when mouse is over, therefore we need to select Opacity for the PropertyName.
The last section, Animation Properties, contains properties for controlling the way a new value is going to be applied to the selected property. Changing the Duration will make the value change gradually over the chosen period, when possible. Choosing an easing function to make the animation non-linear is also possible and there’s quite a few interesting functions to choose from.
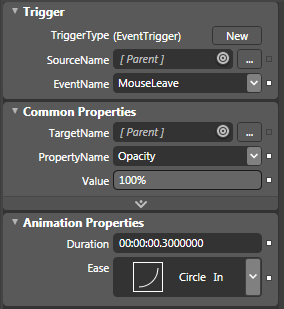
Once the behavior for MouseEnter event is done, we can add yet another behavior, that would take care of returning the shape into the original state. For that, we’ll use the MouseLeave event. Here’s how it all looked like:
PlaySoundAction
The second behavior we’re going to use is called PlaySoundAction. Like the name suggests, it’s used for playing sounds. This one is also an action trigger, meaning we need a trigger to invoke it.
Before doing anything else, we need some sounds (of course). I found a few scary sounds on the SoundBible, which were created by Mike Koenig and thought they would correspond to the shapes quite well.
The PlaySoundAction behavior is shipped with the Blend 3 and available through Assets tab as well. We have to create nine instances of the behavior, one for each button in the ItemsControl. Once dropped over the button, the property panel shows up:
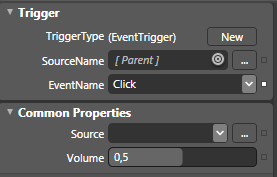
The Trigger section is the same as with previous behavior, with exception of EventName, which, for PlaySoundAction, is set to Click and that’s exactly what we need.
The Common Properties section is about setting the properties for sound. To set a sound, either select it from the dropdown (for the sounds already added in the project), or press the ellipsis button to browse and select from local disk. Quieter sounds can be made louder by setting the Volume to a higher value (and opposite).
Scary sound player in Action
Noticed that we needn’t have to write a single line of code for this application? That’s the power of behaviors - they are of great value to integrators, which are now able to add interactivity to application elements without having to bug developers for code. Of course there are a lot of cases where we would have to resort to coding a custom behavior and we’re going to look into that as well. In this article, we covered two basic behaviors, that shipped with Expression Blend 3 and in future articles we’re going to get to know a lot more.
Finally, after adding some additional finishing touches, the application is ready to deploy. Shame we missed this year’s Halloween, but there’s always next year, right?
Download source code
About
Andrej Tozon works as an consultant and a software developer, specializing in Silverlight and WPF solutions. With years of experience, he continues to pursue new technologies as they become available. He's a regular speaker on local Microsoft conferences and other events.
Andrej is a Microsoft Most Valuable Professional (MVP) for Client Application Development and runs a blog at http://tozon.info/blog/.