This article is compatible with the latest version of Silverlight.
It’s about time for a step by step walkthrough of the internationalization process. For this example, I will use my preferred approach, MVVM. Note that most of the steps would be the same for other internationalization methods that I outlined in my previous post, Implementation Options.
Scenario
In this example we will pretend that we are tasked with building an application whose requirements state that the default language will be English, but that users will also be accessing it from the U.K. and Germany.
I apologize for the small size of the screenshots. I’ll try to update some of these to a bigger size when I have a chance.
1. Let’s start by creating a new project in VisualStudio using the Silverlight Application template, and naming it InternationalizationApp1:
2. When the New Silverlight Application dialog appears, uncheck the ‘Host the Silverlight application…’ checkbox, and click OK:
3. Right-click on the project and add a New Folder:

4. Name the folder Assets, then create a child folder called Resources:
5. Right-click and add a New Item:

6. In the Add New Item dialog select Resources File, name it MyStrings.resx, and click Add:
You should now see the VisualStudio Resource Editor:
7. Add a string called Label_Color, with a value of ‘Color:’
8. Add another string called Label_Date, with a value of ‘Date:’
9. Save your changes:
10. Now let’s add a British version. Copy MyStrings.resx and paste it back in the Resources directory:

11. Rename it to MyStrings.en-GB.resx:
12. Delete the code file, MyStrings.en-GB.Designer.cs:

13. With MyStrings.en-GB.resx selected, click the Properties tab:
14. Next to Custom Tool, remove the string ‘ResXFileCodeGenerator’:
15. Change the Access Modifier to ‘No code generation’
16. Copy MyStrings.en-GB.resx and paste it in the Resources folder:
17. Rename it to MyStrings.de-DE.resx:
We now have our British and German versions of the .resx file. Only the resource file for our default language, English, will have a code file associated with it. The other two do not need one.
18. In MyStrings.en-GB.resx, change the value of Label_Color to ‘Colour’ (add a ‘u’ before the ‘r’ at the end).
19. Delete Label_Date (by right-clicking at the left end of its row and clicking Delete).
20. Save your changes:
21. In MyStrings.de-DE.resx, change the value of Label_Color to ‘Farbe:’.
22. Change the value of Label_Date to ‘Datum:’
23. Save your changes.
We are now done creating our resource strings for English, British and German. Now we simply need to display them in our UI.
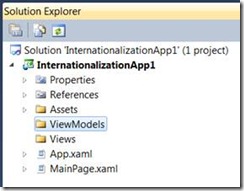
24. Right-click on the project and create folders called ‘Views’ and ‘ViewModels’:

25. Right-click on the Views folder.
26. Select Add New Item.
27. In the Add New Item dialog, select Silverlight on the left side.
28. Select Silverlight User Control, name the file MyView.xaml, and click Add:
29. Right-click on the ViewModels folder.
30. Select Add > Class.
31. In the Add New Item dialog, name the file MyViewModel.cs, and click Add:
32. In the MyViewModel class, add the following read-only properties:
public class MyViewModel
{
public string ResourceLabelColor
{
get { return MyStrings.Label_Color; }
}
public string ResourceLabelDate
{
get { return MyStrings.Label_Date; }
}
}
33. You will also need to add the following using statement:
using InternationalizationApp1.Assets.Resources;
34. In the code-behind of the MyView UserControl, MyView.xaml.cs, add a line that sets the DataContext to an instance of the view model class:
public partial class MyView
{
public MyView()
{
InitializeComponent();
DataContext = new MyViewModel();
}
}
35. You will also need to add the following using statement:
using InternationalizationApp1.ViewModels;
36. In MyView.xaml, add the following xml namespace at the top:
xmlns:Views="clr-namespace:InternationalizationApp1.Views"
37. And replace the Grid with the following:
<Grid x:Name="LayoutRoot" Background="White" Margin="12">
<Views:MyView/>
</Grid>
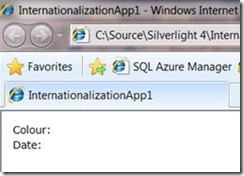
38. Now hi Ctrl+F5 to see what we have:
Please keep in mind that we are not attempting to make anything pretty here, just trying to grasp the basics of internationalization.
39. Now let’s add the lines of code to the Application_Startup method in App.xaml.cs:
private void Application_Startup(object sender, StartupEventArgs e)
{
// Set the culture, for testing purposes
var culture = new CultureInfo("en-GB");
Thread.CurrentThread.CurrentCulture = culture;
Thread.CurrentThread.CurrentUICulture = culture;
this.RootVisual = new MainPage();
}
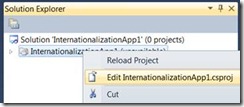
40. There’s still one more thing we need to do to make this work. Right-click on the project and selected Unload Project:
41. Now right-click on the project again and selected Edit InternationalizationApp1.csproj:

42. Locate the SupportedCultures node, and replace it with this:
<SupportedCultures>en-US;en-GB;de-DE</SupportedCultures>
43. Save your changes
44. Right-click on the project again and select Reload Project:
Now hit Ctrl+F5 again:

Notice that the spelling of Color is now Colour.
Now let’s try German.
In App.xaml.cs’ Application_Startup method, change “en-GB” to “de-DE”.
Hit Ctrl+F5 one more time:
Note that when we created the British .resx file, MyStrings.en-GB.resx, we changed the Label_Color string to ‘Colour’, but then we deleted the Label_Date string. The reason for this is that ‘Date’ is spelled the same in the England, so there is no reason to have the key in that .resx file. Because it does not exist, the framework will obtain the string from the default resource file, MyStrings.resx.